These cheerful thumbprint cookies bring a taste of the tropics with sweet pineapple and creamy coconut. They’re soft, chewy, and perfect for a sunny day!
Every time I bake these, the kitchen smells like a beach vacation! I love pairing them with a refreshing drink—talk about a tropical treat! 🌴🍍
Key Ingredients & Substitutions
Butter: Unsalted butter is essential for controlling the saltiness in your cookies. If you’re dairy-free, use coconut oil or a vegan butter substitute for a delicious twist!
Granulated Sugar: Regular granulated sugar gives the best texture. You can swap it with coconut sugar for a more caramel-like flavor, but it may darken your cookies a bit.
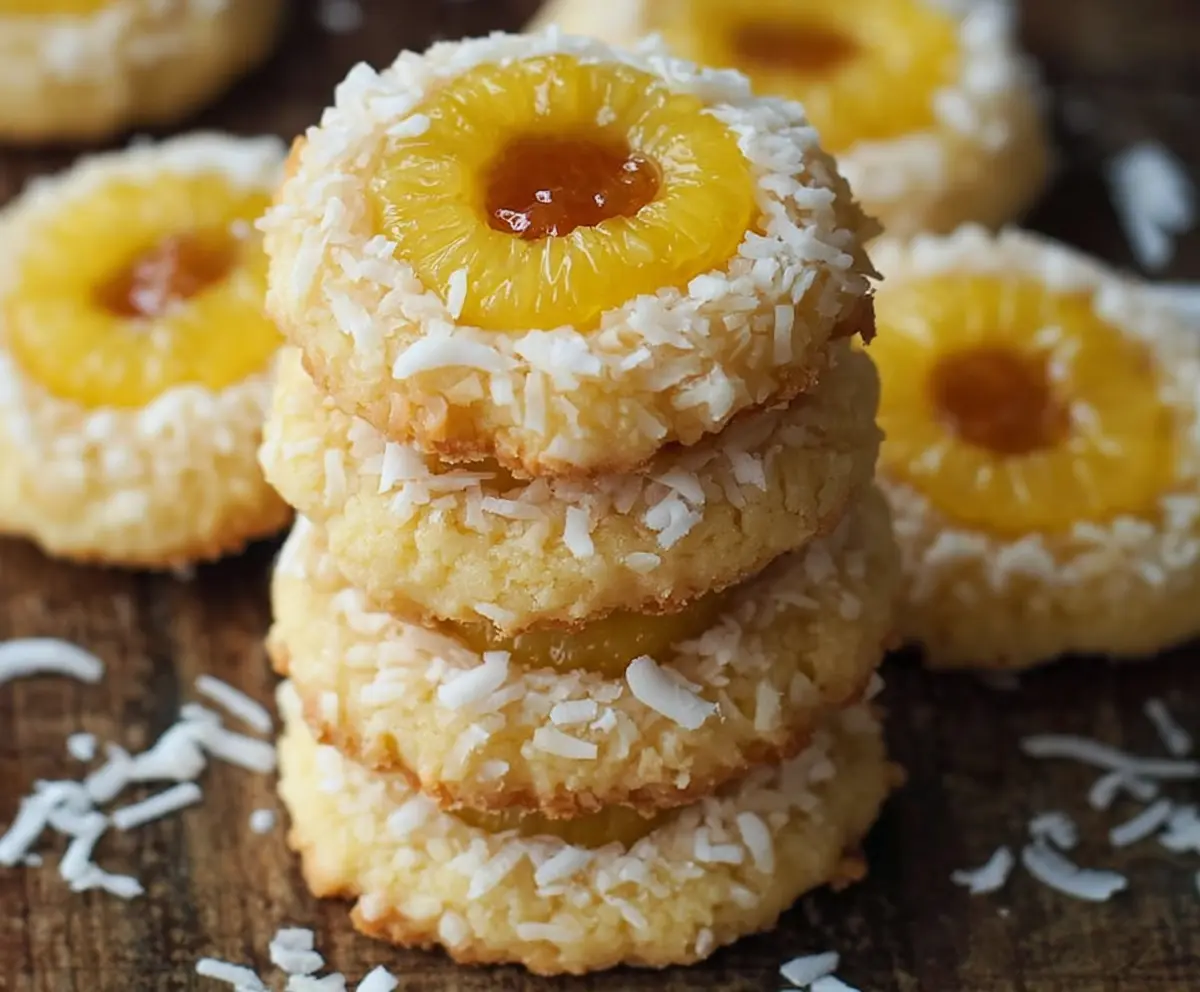
Shredded Coconut: Sweetened shredded coconut adds great flavor. If you’re looking to reduce sweetness, use unsweetened coconut or even try finely chopped nuts for a different crunch.
Crushed Pineapple: Well-drained crushed pineapple keeps the dough from getting too wet. If pineapple is unavailable, consider using another fruit filling like raspberry or mango for a tasty alternative.
Pineapple Jam: This adds an extra burst of flavor in the center. If you can’t find it, look for orange marmalade or any fruit jam you love!
What’s the Best Way to Shape and Fill the Cookies?
Shaping and filling thumbprint cookies might seem tricky, but it’s quite simple! Start by rolling your dough into uniform balls to ensure even baking. Here’s my favorite process:
- Make 1-inch balls and roll them in extra shredded coconut for a nice texture.
- After placing them on the baking sheet, gently press your thumb (or the back of a spoon) in the center. Be careful not to go too deep!
- Fill the indentation with crushed pineapple and top with a little jam. This adds layers of sweetness!
Follow these steps, and you’ll have perfectly shaped cookies ready to bake!
Easy Hawaiian Pineapple Coconut Thumbprint Cookies
Ingredients You’ll Need:
- 1 cup unsalted butter, softened
- 3/4 cup granulated sugar
- 1 teaspoon vanilla extract
- 2 cups all-purpose flour
- 1/2 teaspoon baking powder
- 1/4 teaspoon salt
- 1/2 cup shredded sweetened coconut, plus extra for rolling
- 1 small can (8 oz) crushed pineapple, well-drained
- Pineapple jam or preserves, for thumbprint centers
Time Needed:
This delicious cookie recipe will take you about 20 minutes to prepare and about 12-15 minutes to bake. Plus, let’s add a little time for cooling. In total, you can have these delightful cookies ready in under an hour!
Step-by-Step Instructions:
1. Prepping Your Oven and Baking Sheet:
First, preheat your oven to 350°F (175°C). While it’s heating, line a baking sheet with parchment paper or a silicone baking mat to prevent sticking.
2. Creaming the Butter and Sugar:
In a large mixing bowl, beat the softened butter and granulated sugar together until the mixture is light and fluffy. This step is super important for the texture of your cookies!
3. Adding the Vanilla:
Now, mix in the vanilla extract for a lovely flavor. It brings out the tropical taste in the cookies!
4. Combining Dry Ingredients:
In a separate bowl, whisk together the all-purpose flour, baking powder, and salt. This ensures that the baking powder is evenly distributed throughout the flour.
5. Forming the Dough:
Gradually add the dry ingredient mixture to the butter and sugar mixture. Stir until a soft dough forms—if it seems too sticky, don’t worry; that’s just right!
6. Adding Coconut:
Gently fold the shredded coconut into the dough. Make sure it’s well mixed but be careful not to over-work the dough!
7. Shaping the Cookies:
Using your hands, grab small portions of the dough and shape them into 1-inch balls. Once formed, roll each ball in some extra shredded coconut for a fun outer layer.
8. Placing on the Baking Sheet:
Space the dough balls about 2 inches apart on the prepared baking sheet. Give them room to spread while baking!
9. Creating the Thumbprint:
With your thumb (or the back of a spoon), gently press an indentation into the center of each dough ball. This is where the pineapple filling will go!
10. Filling the Indents:
Take a small teaspoon of the well-drained crushed pineapple and fill each thumbprint indentation. Don’t overfill—just a little is enough!
11. Adding the Jam:
Top each pineapple filling with a small dollop of pineapple jam or preserves for a sweet finish. It adds a delicious touch!
12. Baking the Cookies:
Bake in the preheated oven for about 12-15 minutes or until the edges are lightly golden. Keep an eye on them to avoid overbaking!
13. Cooling Time:
Once done, remove the cookies from the oven and let them cool on the baking sheet for about 5 minutes. Then, transfer them to a wire rack to cool completely.
14. Time to Enjoy:
Your tropical-inspired Hawaiian Pineapple Coconut Thumbprint Cookies are ready to enjoy! Pair them with a cup of tea or coffee, and savor the taste of the islands any time you like!
Can I Use Fresh Pineapple Instead of Canned?
Yes, you can use fresh pineapple! Just make sure to finely chop it and drain off excess juice to avoid making the cookie dough too wet. Fresh pineapple will add a vibrant flavor to your cookies!
What If I Don’t Have Shredded Coconut?
If you’re out of shredded coconut, you can use unsweetened coconut flakes or even ground almonds for a unique twist. Keep in mind that the flavor will vary slightly, but the cookies will still be delicious!
Can I Make the Cookie Dough Ahead of Time?
Absolutely! You can prepare the cookie dough and refrigerate it in an airtight container for up to 3 days. When ready to bake, simply let it soften slightly at room temperature before shaping and filling.
How Should I Store Leftover Cookies?
Store any leftover cookies in an airtight container at room temperature for up to 3 days. For longer storage, keep them in the fridge for up to a week, or freeze them for up to 3 months. Just make sure to separate layers with parchment paper if stacking!