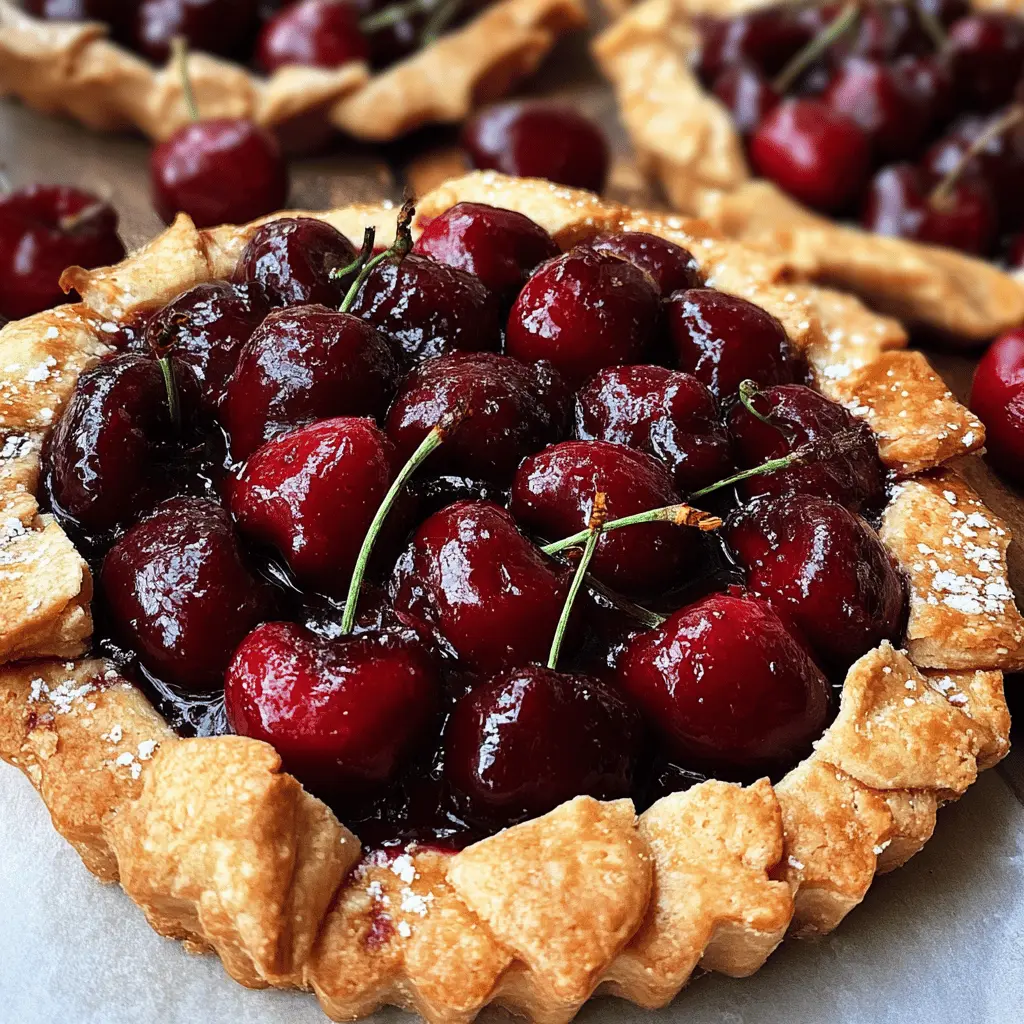
These Easy Rustic Cherry Tarts are a treat! With a buttery crust and sweet cherry filling, they’re a simple dessert that looks fancy without too much fuss.
Making these tarts is almost as fun as eating them! I love to enjoy them warm with a scoop of ice cream on top—what’s better than sweet cherries and creamy goodness? 😋
Key Ingredients & Substitutions
Fresh Cherries: Sweet cherries are the star of this tart. If they’re out of season or you’re looking for an easier option, you can use frozen cherries. Just make sure to thaw and drain them first to avoid excess moisture.
Pie Crust: Using a refrigerated pie crust saves time, but homemade is always a great choice! If you want a gluten-free option, look for a gluten-free pie crust at the store.
Cornstarch: This ingredient helps thicken the cherry juices. You can swap it with tapioca starch if that’s what you have on hand.
Almond Extract: It adds a lovely nutty flavor that pairs really well with cherries. If you’re not a fan or have a nut allergy, simply leave it out. The tart will still taste great!
How Do I Make Sure My Crust Turns Out Perfect?
A flaky crust is all about handling it gently. Here are some tips for success:
- Keep your dough cold! This helps to create that flaky texture.
- Roll out your dough on a lightly floured surface to prevent sticking. Don’t worry if it’s not a perfect circle; rustic is the theme here!
- When folding the edges, you can crimp them or merely fold them over; both will look charming.
Don’t skip the egg wash—it helps to give the crust a lovely golden color and shine!
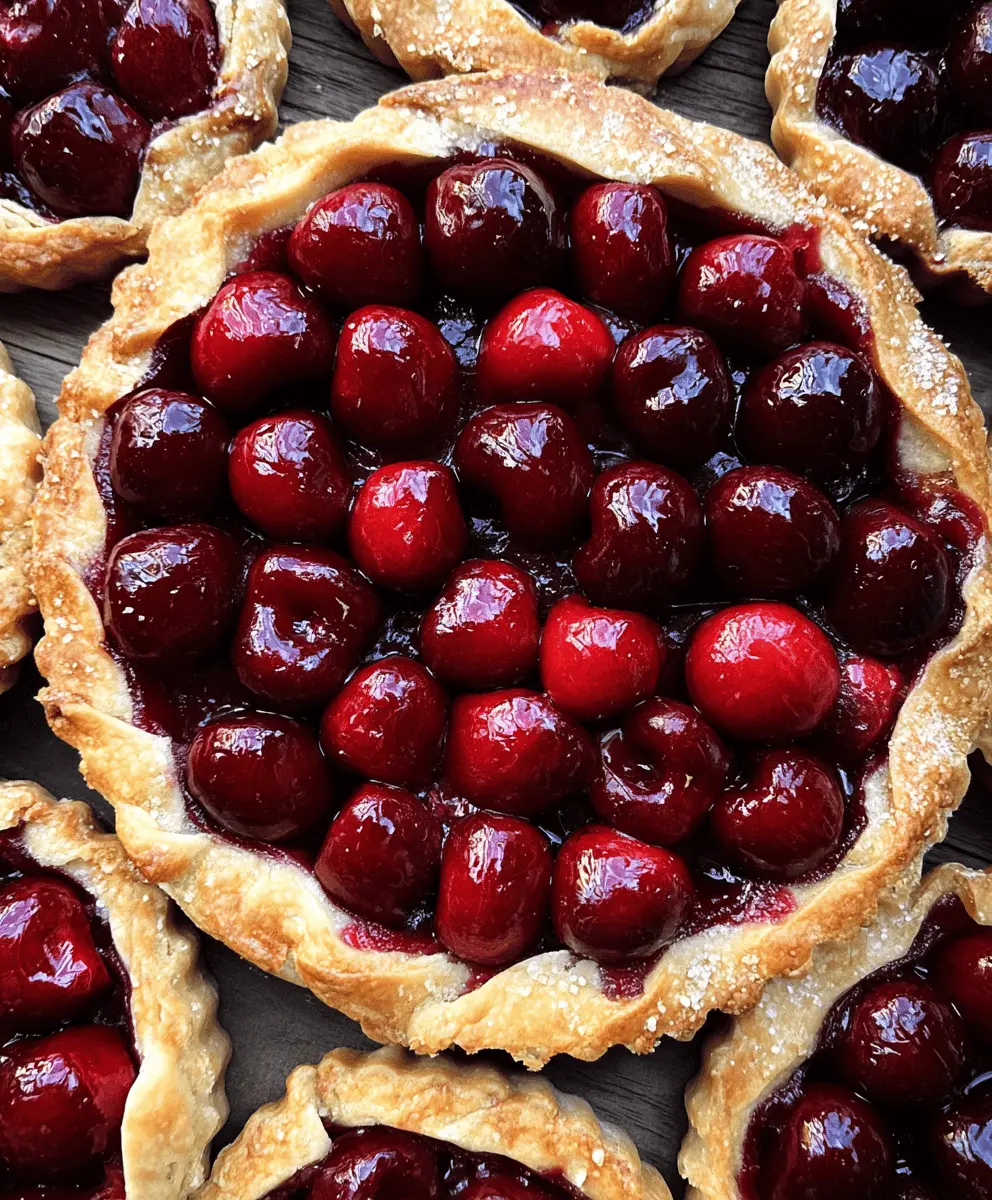
Easy Rustic Cherry Tarts
Ingredients You’ll Need:
- 1 sheet of refrigerated pie crust (or homemade pie dough), thawed
- 2 cups fresh cherries, pitted and halved
- 1/2 cup granulated sugar
- 2 tablespoons cornstarch
- 1/2 teaspoon vanilla extract
- 1 tablespoon lemon juice
- 1/4 teaspoon almond extract (optional, complements cherry well)
- 1 egg, beaten (for egg wash)
- Coarse sugar for sprinkling on crust (optional)
How Much Time Will You Need?
This recipe will take about 15 minutes to prepare plus around 30-35 minutes of baking time. Allow some extra time for cooling before you dive in. All in all, expect to spend about an hour for this delightful dessert!
Step-by-Step Instructions:
1. Preheat and Prepare:
Start by preheating your oven to 400°F (200°C). Line a baking sheet with parchment paper to prevent your tart from sticking.
2. Mix the Filling:
In a medium-sized mixing bowl, combine the pitted cherry halves, granulated sugar, cornstarch, vanilla extract, lemon juice, and almond extract if you’re using it. Toss everything together gently so that the cherries are well coated. Let the mixture sit for about 5-10 minutes to allow the flavors to meld.
3. Roll Out the Crust:
On a lightly floured surface, roll out the refrigerated pie crust into a circle that’s about 12 inches in diameter. Don’t worry if it’s not a perfect shape; rustic is the name of the game!
4. Assemble the Tart:
Transfer the rolled-out crust onto your prepared baking sheet. Spoon the cherry filling into the center of the dough, leaving about a 2-inch border around the edges.
5. Fold the Edges:
Carefully fold the edges of the dough over the filling. You can pleat it as you go for a nice rustic look, but leave the center exposed so the cherries are visible.
6. Brush and Sprinkle:
Use the beaten egg to brush all around the crust edges. This gives it a lovely golden color when baked. If you like, sprinkle some coarse sugar over the crust for an extra touch of sweetness and crunch!
7. Bake:
Place the tart in the oven and bake for 30-35 minutes, or until the crust is beautifully golden brown and the cherry filling is bubbly.
8. Cool and Serve:
Once baked, remove the tart from the oven and let it cool slightly. You can serve it warm or at room temperature. It’s delightful on its own or even better with a scoop of vanilla ice cream or a dollop of whipped cream!
Enjoy your beautiful and delicious Easy Rustic Cherry Tarts! 🍒🥧
FAQ for Easy Rustic Cherry Tarts
Can I Use Frozen Cherries in This Recipe?
Yes, you can use frozen cherries! Just make sure to thaw them completely and drain any excess liquid before mixing them with the other ingredients to avoid a soggy filling.
How Can I Make this Tart Gluten-Free?
To make a gluten-free version, use a gluten-free pie crust that you can find at most grocery stores or make your own using gluten-free flour blends. Just ensure all other ingredients are also gluten-free.
Can I Prepare the Tart Filling in Advance?
Absolutely! You can prepare the cherry filling a day ahead and store it in the refrigerator. Just mix it before adding it to the crust to combine everything evenly again.
What’s the Best Way to Store Leftovers?
Store any leftover tart in an airtight container in the refrigerator for up to 3 days. You can enjoy it cold, or reheat individual slices in the microwave for a warm treat!