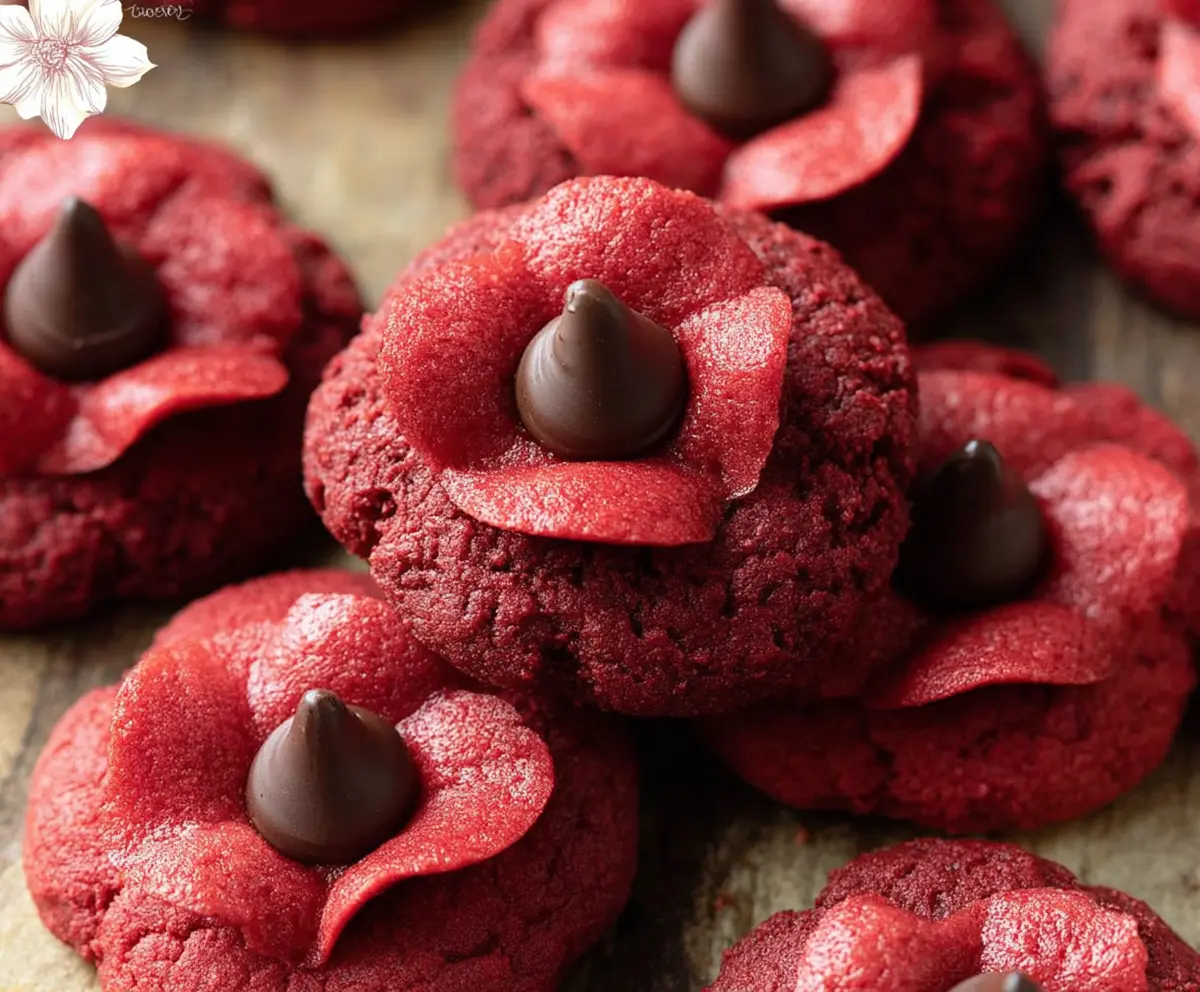
These Red Velvet Blossom Cookies are a sweet treat that combines the rich flavor of red velvet with a chocolate kiss right in the center. They look as good as they taste!
They’re soft, chewy, and perfect for special occasions or just because. I love baking them and watching everyone smile when they see that chocolate surprise! 🍫❤️
Key Ingredients & Substitutions
Butter: Unsalted butter is ideal for controlling salt levels in your cookies. However, if you’re in a pinch, you can use margarine or coconut oil. Both will work, but the flavor may differ slightly.
Sugar: Granulated sugar adds sweetness and helps with the cookie’s texture. For a less refined option, you can substitute with coconut sugar or brown sugar, which will make the cookies a bit chewier.
Egg: The egg acts as a binder. If you’re looking for an egg substitute, use 1/4 cup of unsweetened applesauce or a flax egg (1 tbsp flaxseed meal mixed with 2.5 tbsp water) for a vegan option.
Red Food Coloring: This is what gives the cookies their famous color. If you prefer natural options, use beet juice, but keep in mind it may alter the flavor slightly.
Flour: All-purpose flour works best for this recipe. If you want a gluten-free option, try using a 1:1 gluten-free flour blend. Just make sure that it contains xanthan gum for the right texture!
How Do I Ensure My Cookies Stay Soft and Chewy?
To keep your red velvet cookies soft and chewy, pay close attention to the baking time. Overbaking is a common mistake that can lead to dry cookies.
- Set your timer for the minimum baking time, around 10 minutes. Check for a slight set at the edges while the middle looks soft.
- Let them cool on the baking sheet for 5 minutes before transferring them to a wire rack. This helps them firm up without drying out.
- Store your cookies in an airtight container at room temperature to maintain their softness. Adding a slice of bread can also help retain moisture!
Delicious Red Velvet Blossom Cookies
Ingredients You’ll Need:
For the Cookie Dough:
- 1/2 cup unsalted butter, softened
- 1 cup granulated sugar
- 1 large egg
- 1 tablespoon red food coloring
- 1 teaspoon vanilla extract
- 1 cup all-purpose flour
- 1/4 cup unsweetened cocoa powder
- 1/2 teaspoon baking soda
- 1/4 teaspoon salt
For the Filling and Topping:
- 100g white chocolate chips (for filling)
- Optional: assorted colored chocolate kisses (white, milk, or flavored) for topping
How Much Time Will You Need?
This recipe takes about 15 minutes for preparation and 10-12 minutes for baking, making the total time around 30 minutes. Just a little time for a delightful treat that everyone will rave about!
Step-by-Step Instructions:
1. Preheat the Oven:
Start by preheating your oven to 350°F (175°C). While it’s heating up, line a baking sheet with parchment paper. This prevents the cookies from sticking!
2. Cream the Butter and Sugar:
In a large mixing bowl, cream together the softened butter and granulated sugar. Use an electric mixer or a whisk until the mixture is light and fluffy. This step is super important for fluffy cookies!
3. Add the Wet Ingredients:
Now, beat in the egg, red food coloring, and vanilla extract. Make sure everything is well mixed. You’ll love the bright color it adds!
4. Prepare the Dry Ingredients:
In another bowl, whisk together the all-purpose flour, cocoa powder, baking soda, and salt. This mix will give your cookies that delicious chocolatey flavor!
5. Combine Everything:
Gradually mix the dry ingredients into the wet ingredients until a soft dough forms. Be careful not to over-mix—just until combined!
6. Shape the Cookies:
Roll spoonfuls of dough into balls about 1.5 inches in diameter. Place these on your prepared baking sheet, spacing them about 2 inches apart to allow room for spreading.
7. Bake:
Bake the cookies in the preheated oven for about 10-12 minutes. They should be set around the edges but still soft in the middle.
8. Add the Chocolate Kiss:
As soon as you take the cookies out of the oven, press a chocolate chip or kiss gently into the center of each cookie. This is where the magic happens!
9. Cool the Cookies:
Let the cookies cool on the baking sheet for about 5 minutes. This helps them firm up a bit. Then, transfer them to a wire rack to cool completely.
10. Serve and Enjoy!
These charming red velvet cookies with their melted chocolate center are now ready to brighten your day! Enjoy them fresh or store them in an airtight container.
These cookies have a soft, tender texture with the rich flavor of red velvet, highlighted by the melted chocolate center that gives a delightful pop of sweetness. Perfect for holidays or any festive occasion!
Can I Use Other Types of Chocolate for the Center?
Absolutely! You can use milk chocolate, dark chocolate, or even flavored chocolate kisses for a fun twist. Each variety will bring a unique flavor profile to your cookies!
How Do I Store Leftover Cookies?
Store any leftover cookies in an airtight container at room temperature for up to 3 days. If you want them to last longer, you can freeze them for up to 3 months. Just make sure to separate layers with parchment paper!
Can I Make the Dough Ahead of Time?
Yes, you can! Prepare the dough and refrigerate it in an airtight container for up to 2 days. When ready to bake, simply scoop and bake as instructed, adding a couple of extra minutes to the baking time if the dough is cold.
Can I Use Different Colors of Food Coloring?
Yes! While red is traditional, feel free to experiment with different colors to match occasions or just for fun. Just be sure to use gel food coloring for the brightest results!