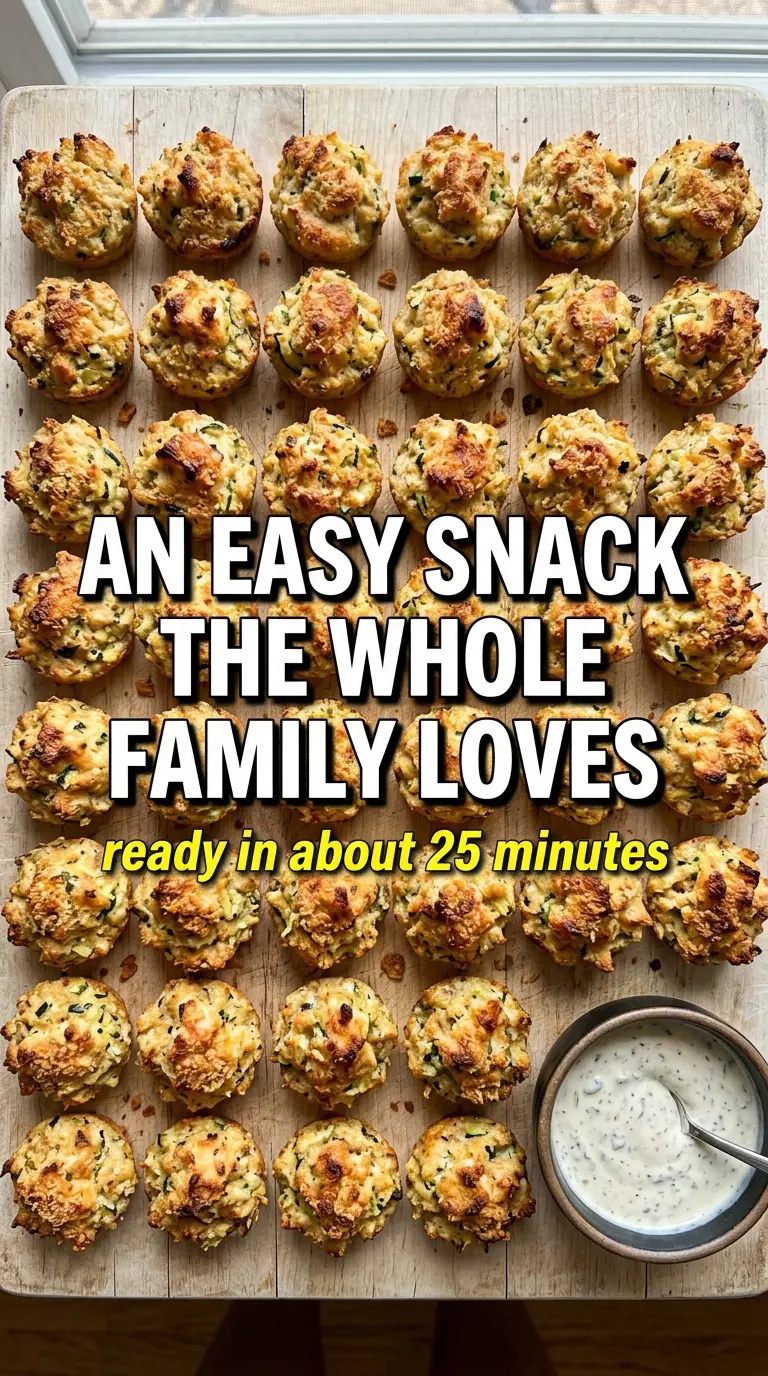
Chicken zucchini poppers are the kind of weeknight dinner that disappears fast because they hit that sweet spot between crisp and tender. The outside turns deeply golden in the skillet while the inside stays juicy, and the zucchini keeps the chicken from feeling heavy or dry. They taste like something you meant to plan ahead, even though the whole thing comes together with a few pantry staples.
The part that makes these work is the zucchini. Once you squeeze out the moisture, it disappears into the mixture and leaves behind a softer, more succulent bite without watering down the poppers. Breadcrumbs and egg give the mixture enough structure to hold its shape, while parmesan adds salt and a little nutty edge that keeps every bite interesting.
Below, you’ll find the trick to getting the zucchini dry enough, the pan heat that gives you a crisp crust instead of a pale exterior, and a few easy ways to adapt these poppers for different diets or dipping sauces.
The zucchini stayed tucked right into the chicken and the poppers browned up beautifully in the skillet. I served them with ranch and my kids ate them without picking out a single green speck.
Pin these chicken zucchini poppers for a crispy, juicy skillet dinner that sneaks in extra vegetables without losing that golden edge.
The Secret to Juicy Chicken Poppers Is Getting the Zucchini Dry Enough
Most soggy chicken-and-zucchini recipes fail before they ever hit the pan. Zucchini holds a lot of water, and if that moisture stays in the bowl, the mixture turns loose and the poppers steam instead of sear. The goal is a mixture that holds together cleanly when you roll it, not one that slumps in your hand.
Squeezing the zucchini hard changes everything. I like to grate it first, then gather it in a clean kitchen towel and wring it until the liquid stops dripping out. If the zucchini still feels damp, the poppers will need extra breadcrumbs, and that usually makes them dense. Dry zucchini gives you a mixture that browns well and stays tender inside.
- Ground chicken — Use regular ground chicken, not extra-lean if you can avoid it. A little fat helps the poppers stay juicy through the full skillet cook.
- Shredded zucchini — This is the moisture keeper and the vegetable boost. Squeeze out as much water as possible, or the mixture will be too soft to brown properly.
- Breadcrumbs — These give the mixture structure. Plain or Italian-style both work, but if you use seasoned breadcrumbs, reduce the Italian seasoning slightly so the flavor doesn’t get too busy.
- Parmesan — Freshly grated parmesan melts into the mix better than the shelf-stable kind. It adds salt and helps the outside brown.
- Egg — The egg binds everything together so the poppers hold their shape in the skillet. One large egg is enough; another egg can make the mixture loose.
- Garlic and Italian seasoning — These build the flavor fast without extra chopping. If you want a sharper garlic punch, use fresh garlic; if you want a softer result, garlic powder works in a pinch.
How to Get a Golden Crust Without Overcooking the Center
Mix the Meat Just Until It Comes Together
Combine the ingredients in a large bowl and stop as soon as the mixture looks even. If you work it like meatballs for a long time, the chicken gets tight and the poppers turn bouncy instead of tender. The mixture should feel cohesive and slightly sticky, but still light enough to scoop.
Shape Small So They Cook Through Cleanly
Form the mixture into small balls, about 1½ tablespoons each. Smaller poppers cook through before the outside gets too dark, which is the easiest way to avoid a browned shell with a raw center. If the mixture sticks to your hands, lightly wet your palms instead of adding more breadcrumbs to the bowl.
Pan-Fry in a Hot Enough Skillet
Heat the olive oil over medium heat until it shimmers, then add the poppers in a single layer. You want an active sizzle as they hit the pan, not a quiet slide, because that first contact sets the crust. Cook for 3 to 4 minutes per side, turning only once so the outside has time to brown. If the pan is overcrowded, the temperature drops and the poppers steam, so cook in batches and keep the first batch warm on a plate.
Check for Done Without Drying Them Out
The poppers are ready when they’re deeply golden and feel firm when pressed gently with a spatula. Cut one open if you’re unsure; the center should be opaque with no pink chicken left. Pull them from the skillet as soon as they’re done, because an extra minute in the pan is enough to squeeze out the last bit of juiciness.
Three Ways to Make Chicken Zucchini Poppers Fit Your Table
Gluten-Free Version
Swap the breadcrumbs for a gluten-free breadcrumb blend or finely crushed gluten-free crackers. The texture stays close to the original, though some blends absorb a little more moisture, so start with the listed amount and only add more if the mixture feels too wet to roll.
Dairy-Free Adjustment
Leave out the parmesan and add 2 to 3 tablespoons nutritional yeast for a savory edge. The poppers will still brown, but they’ll taste a little less salty and nutty, so add an extra pinch of salt if your seasoning mix is mild.
Lighter, More Vegetable-Forward Poppers
Use an extra half cup of zucchini if you want them a little softer and more veggie-heavy, but squeeze it well and expect a more delicate texture. The mixture will be less dense and the poppers may need an extra minute per side to set fully.
Storage and Reheating
- Refrigerator: Store in an airtight container for up to 4 days. The crust softens a bit in the fridge, but the flavor holds well.
- Freezer: These freeze well after cooking. Freeze in a single layer first, then transfer to a bag or container for up to 2 months.
- Reheating: Warm them in a skillet over medium-low heat or in a 375°F oven until heated through. The mistake to avoid is blasting them in the microwave, which makes the zucchini watery and the coating soft.
Answers to the Questions Worth Asking

Chicken Zucchini Poppers
Ingredients
Equipment
Method
- Combine ground chicken, shredded zucchini, breadcrumbs, parmesan, egg, garlic, and Italian seasoning in a large bowl and mix until well combined (no dry pockets).
- Form the mixture into small balls, about 1½ tablespoons each, and place them on a plate as you go (aim for even size so they cook through together).
- Heat olive oil in a large skillet over medium heat until it shimmers, about 1 minute (the pan should be hot before adding poppers).
- Add the poppers in a single layer and cook for 3–4 minutes per side, until golden brown and cooked through (flip once for best browning).
- Work in batches if needed to avoid overcrowding the pan, keeping the oil temperature steady so the outside stays crisp.
- Serve the poppers warm with your favorite dipping sauce so they stay crisp on the edges.